Spellbinders Dies are a relatively new resource for scrappers and cardmakers. They are a very useful addition to any papercrafters toolbox, especially the “Nestabilities”, which I am going to show you here.
Usually the Spellbinders belong to the “Wizard” Cutting system, but I am going to use mine in the Sizzix (Original).
For the purposes of this tute I am using the Spellbinders “Nestabilities – Shapeabilities” Flower.
You Need:
Spellbinders Die(s), scrap paper, Sizzix machine, Sizzix System Converter and some sheets of leftover card or chipboard (there are other Spellbinders Tools that are specific for this job but I am just using these today).

Step One:
Place your scrap paper on the Sizzix base FACE UP and your Die FACE DOWN (meaning the ridged edge of the Die is directly against the paper).


Step Two:
Put your Sizzix System Converter in place and then place three sheets of spare card in top of your Die. You may need more or less sheets of card depending on their thickness.

Step Three:
Compress your sheets through the Sizzix machine just like you would normally do with a Die – you will find it harder to push down and you may need to so it in stages with some of the bigger dies.

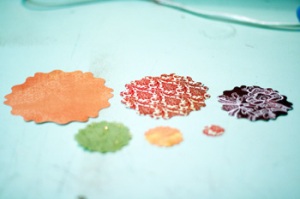
You should end up with a Die Cut shape with a nicely rolled edge and even some embossing from the Die edges.

Make sure you cut out all the different sizes of Die – we are going to use them all for this flower.
Step Four:
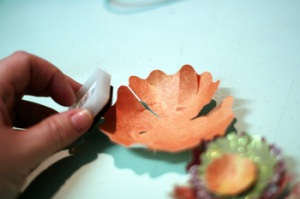
Using a sharp pair of scissors (I use the Fiskars ones), cut a few seperate petals by cutting into the centre of the flower. DO NOT snip all the way into the centre of the flower as you will eventually cut it in half. Do the same thing to all of your other flower shapes.

Step Five:
Once the flowers have all been snipped, place them in the palm of your hand and, using the shape of your hand, crush the flowers so that you are giving them a curved shape.


Step Six:
Once the flowers are all crushed and curved, ink the outer edges with some colour to give the petals a bit of depth.

Step Seven:
Now layer the flowers on top of each other with your adhesive of choice (I used a hot glue gun for speed) and then place some gems in the flower centre – awww pretty.

VOILA! Done.
Sares x


 Stumble It!


[…] Tips & Techniques – Using Spellbinders and Sizzix […]
Thanks for the tips on using spellbinders dies with the original sizzix. Very helpful!
Your flowers are really nice, too. I’ll have to try that technique some time.
Sarah, You did a beautiful job using spellbinders dies with the orginal sizzix. In fact that is why we started carrying Sizzix on our website cutathome.com because both Spellbinders and Sizzix go so well together! Love it!
You can’t miss the top 10 most popular horror movies, trust me.
Only the person in recovery knows how they are doing.
It’s regarding the intense emotions he or she
gets when they watch pornography.
Wonderful items from you, man. I have be aware your stuff prior to and you are just too great.
I actually like what you’ve got here, really like what
you are stating and the best way through which you assert
it. You are making it entertaining and you continue to take care of to keep it sensible.
I cant wait to learn much more from you. That is really a wonderful website.
Thank you for this tutorial. I am new to card making and the sizzix original which I have just bought. This definitely helped me.
Joan