


 Stumble It!

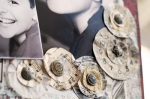
There’s a new “Flower” being produced by Prima at the moment that is a couple of circles layered on top of each other with a button or brad through the centre.
They are very cute, but also very expensive – so here is a “budget buster” version of how to create your own.
Follow the picture gallery below for visual cues on how to create these layered flowers, along with the steps written below.
Step One:
Gather together some scrap supplies, a circle template (I am using a Fiskars on but you could use a wine glass or the insode of a tape roll if you don’t have one).
Start tracing three different sized circles on three different pieces of paper.
Step Two:
Cut the circles out carefully with either a blade or a pair of scissors.
Once cut out, crush each circle in your hand and then unfold it again.
Step Three:
Using a fine grade sandpaper, sand the outer edges of the circle and a little on the top of the circle.
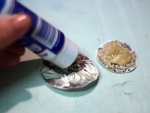
Use adhesive to stick the three circles together – one on top of the other – and then use a button ir brad to attach the flower to the LO base (or whatever project you are working on).


See? How easy was that?
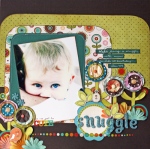
Here are a few LO’s for you to look at for inspiration in using your layered flowers, circles.


Have fun and happy scrapping!
Sares x


[…] Tips & Techniques – Layered Circle Flowers/Embellishments […]
Lovely Sarah, I’m having a weekend scrapping at a retreat so will have a go. Great work with the memory books!!!
I am loving those circle flowers, Sarah! Going to give them a go this week, for sure. You a such a talented designer and am enjoying reading all your tips and techniques.
I recently posted an entry on my blog with a link to this tutorial.
Would you let me know if that’sOK?
Thanks,
Nancy Ward
http://paperfriendly.blogspot.com
Those are fabulous! TFS!